










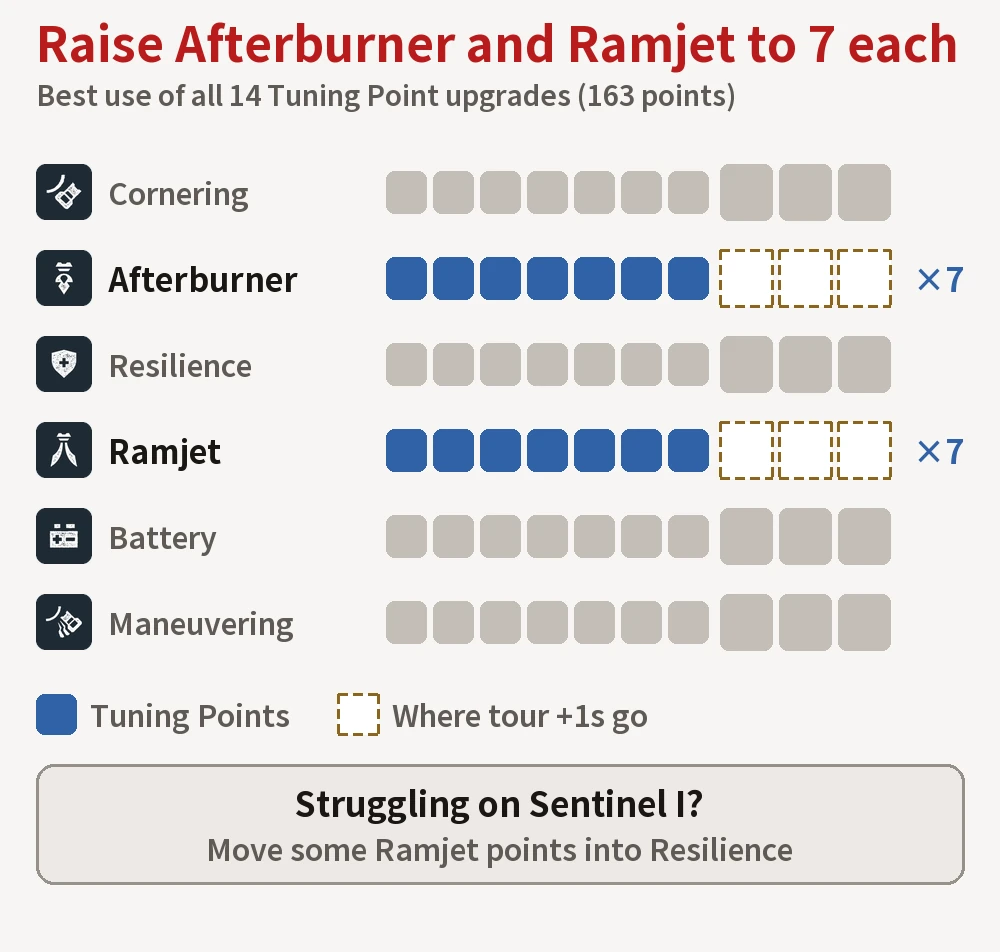
To go faster, put your upgrades into Afterburner and Ramjet. Afterburner also strengthens your regular acceleration, so raise it first.
How you spend them differs between the upgrades you buy with points and the +1s you get during a tour.
- Tuning Points
raise Afterburner to 7, then Ramjet to 7 as well. They stay even when you’re Knocked Out - +1s during a tour
put them on stats you’ve raised to 7 and they go into the large boxes on the right, adding twice as much. They last only for that tour
If you’re struggling on Sentinel I in Act II, move some of your Ramjet points into Resilience.
Where Should You Spend Tuning Points?
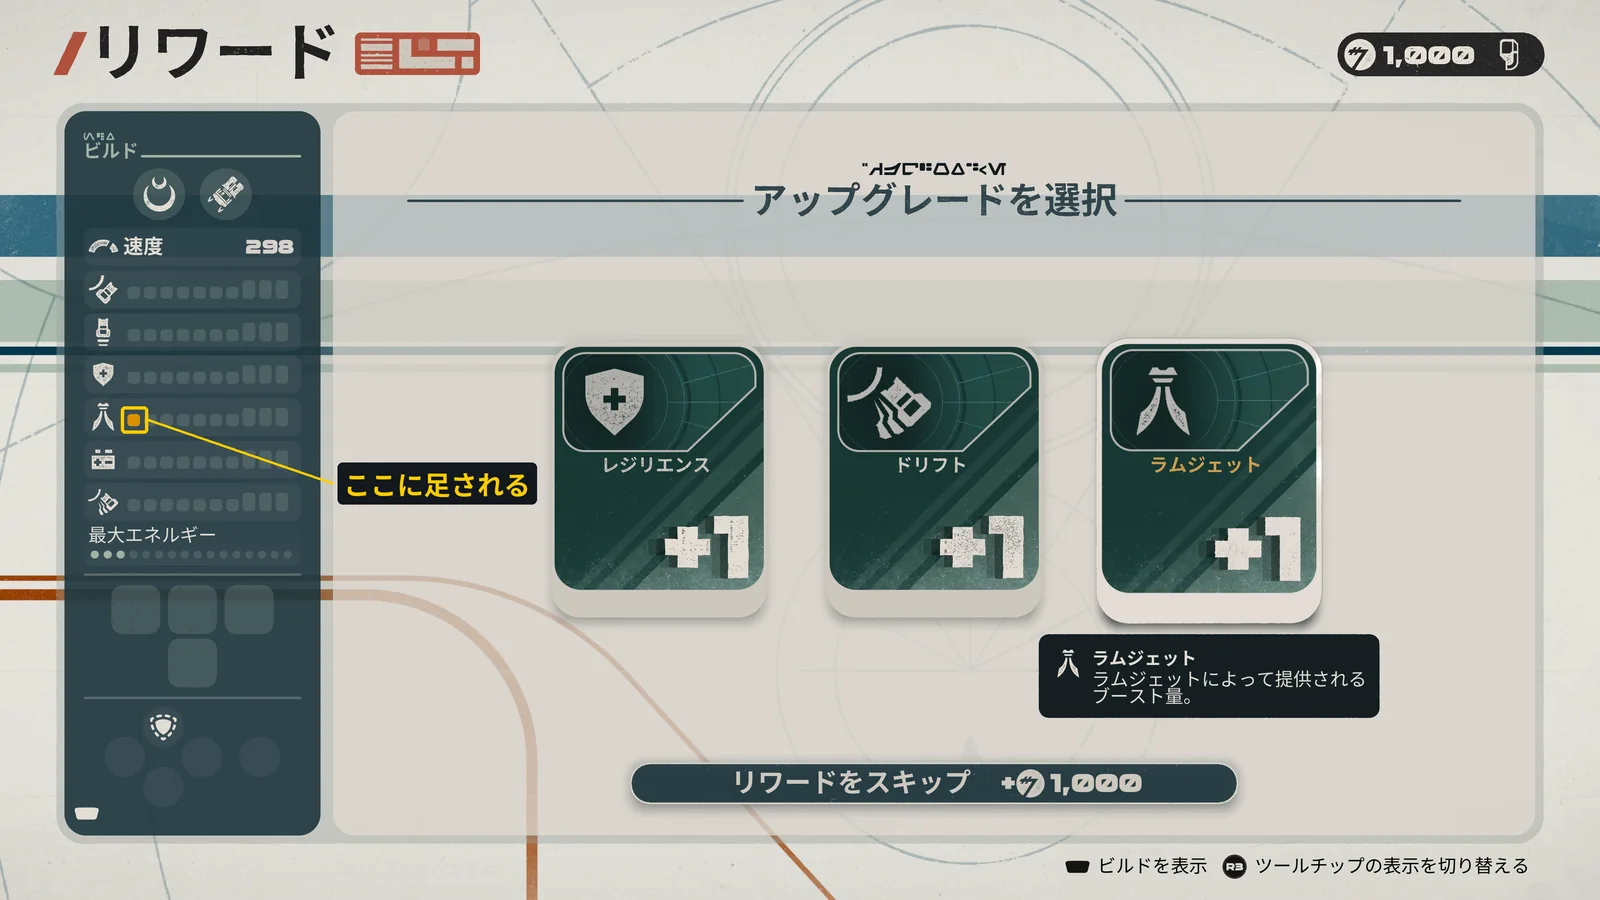
On the vehicle select screen, press △ to open the Upgrade Vehicle screen. This is where you spend Tuning Points. The screen shows only icons for the six stats, not their names, so match the icons against the table below. For speed, Afterburner and Ramjet are the ones to raise.
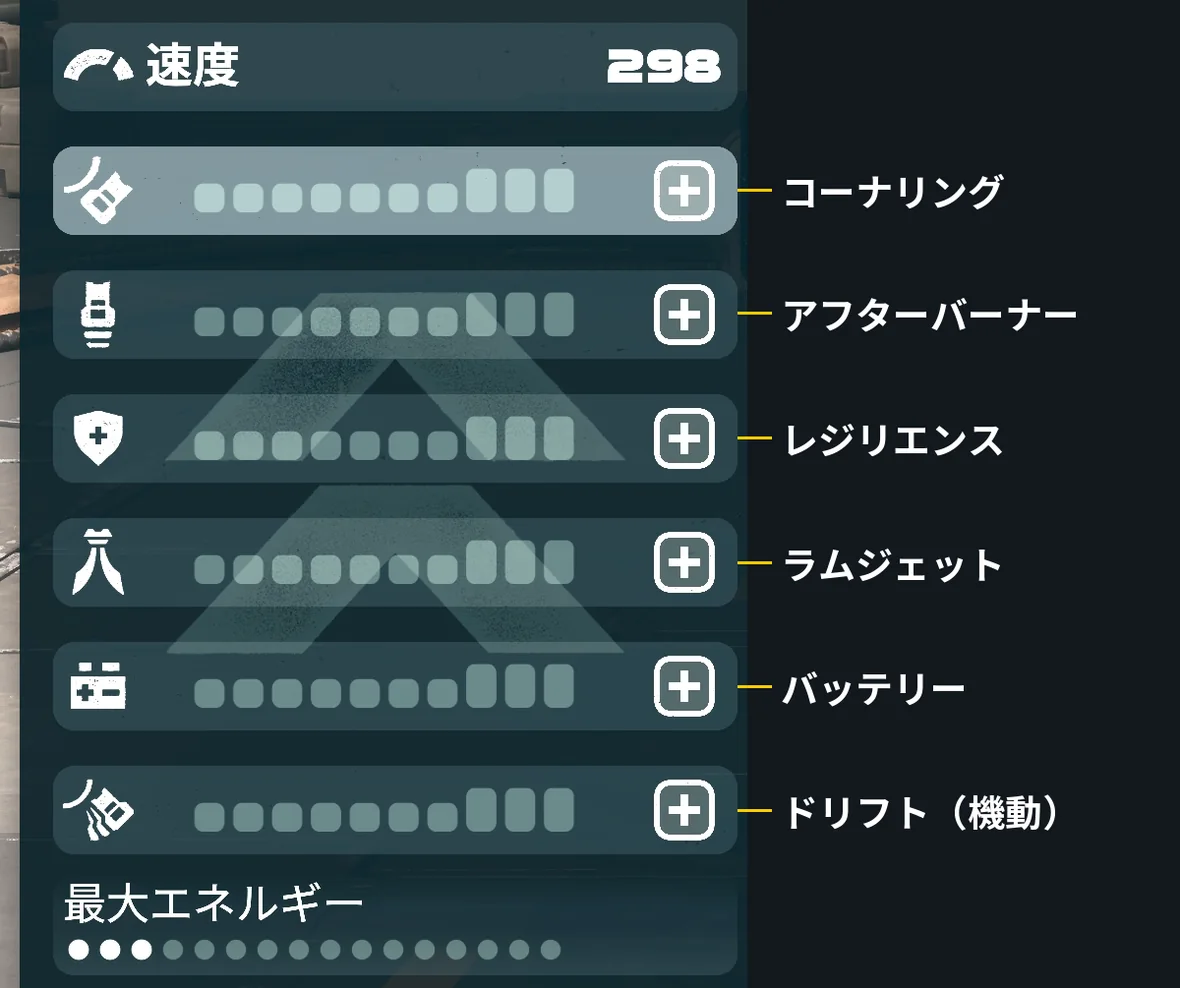
| Stat | What it improves (in-game description) | Priority |
|---|---|---|
| Afterburner | Acceleration and deceleration, plus Afterburner boost | Top priority |
| Ramjet | Ramjet boost | Second |
| Resilience | Resistance to damage, Malfunctions, and negative status effects | Before Sentinel I |
| Cornering | How quickly and tightly you take corners | Later |
| Maneuvering | Performance of your Vehicle Type‘s maneuver (Drift, etc.) | Later |
| Battery | Max Energy available for Abilities | Later |
Every Stat Adds the Same Speed
Speed at the top of the screen is your top speed without boosting. It goes up by 4km/h per box, whichever of the six stats you raise (about 7km/h on the Podracer). Since every stat adds the same, choose stats for what each one does.
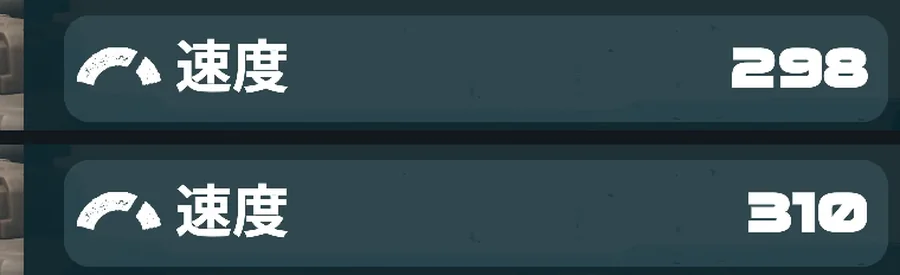
Using all 14 Tuning Point upgrades adds +56km/h to Speed. Fill every box on all six bars with tour +1s as well, and it’s +241km/h. Base speed differs by Vehicle Type.
| Vehicle Type | Base speed |
|---|---|
| Landspeeder | 298km/h |
| Speeder Bike | 298km/h |
| Skim Speeder | 306km/h |
| Podracer | 451km/h |
Our vehicle list compares all four types in full, including acceleration and maneuvers.

How Much Does Maxing a Stat Change?
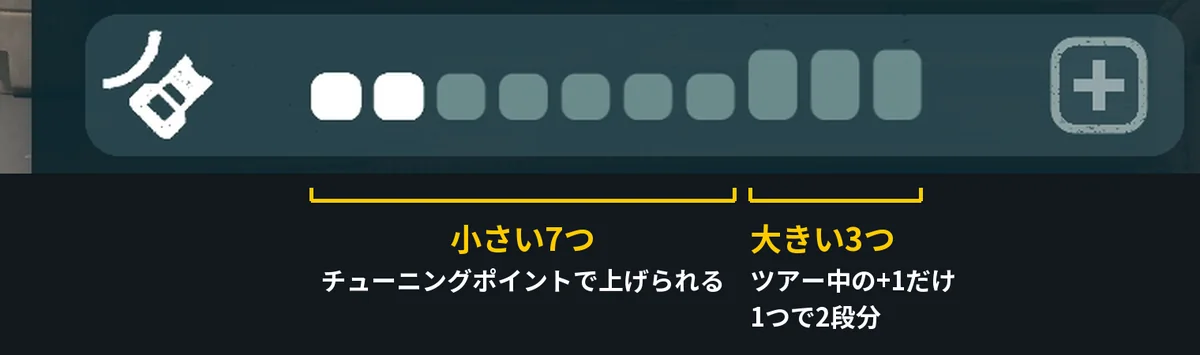
Each stat bar has 10 boxes: 7 small ones on the left and 3 large ones on the right. Tuning Points can only fill the 7 small boxes. The 3 large boxes can only be filled with tour +1s, but each one counts as two small boxes.
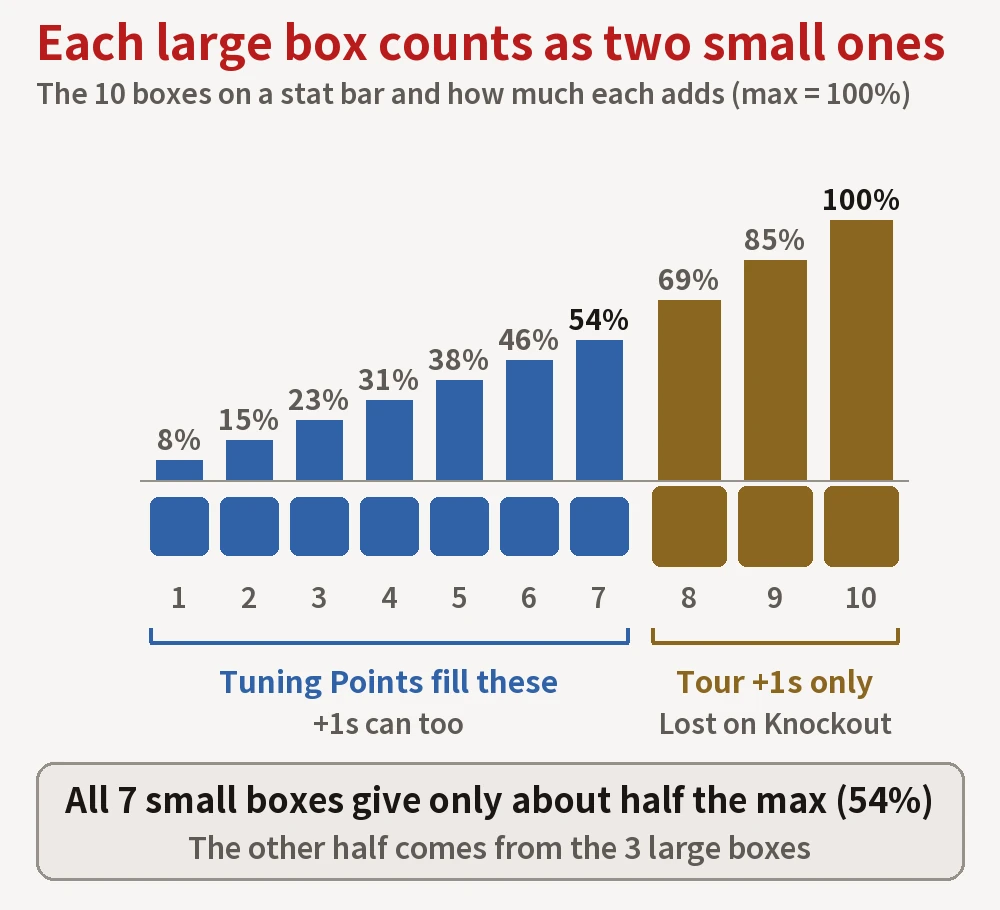
We compared the effects with the 7 small boxes filled (as far as Tuning Points alone can go) and with all 10 filled (with tour +1s added). All values are changes from before any upgrades.
| Stat | Effect | 7 boxes | 10 boxes |
|---|---|---|---|
| Afterburner | Acceleration | ~1.5x | ~1.9x |
| Afterburner | Top speed on Afterburner | +22km/h | +40km/h |
| Ramjet | Top speed on Ramjet | +43km/h | +80km/h |
| Resilience | Knockback when rammed | ~51% less | 95% less |
| Resilience | Impact when hitting a wall | ~13% less | 25% less |
| Cornering | Turning radius at high speed | ~22% smaller | 40% smaller |
| Battery | Max Energy | +7 | +13 |
Since each large box counts as two small ones, filling all 10 boxes gives about twice the effect of 7. Even before any upgrades, Afterburner adds +64km/h to your top speed and max Energy is 3; the values in the table are added on top.
Afterburner Comes First
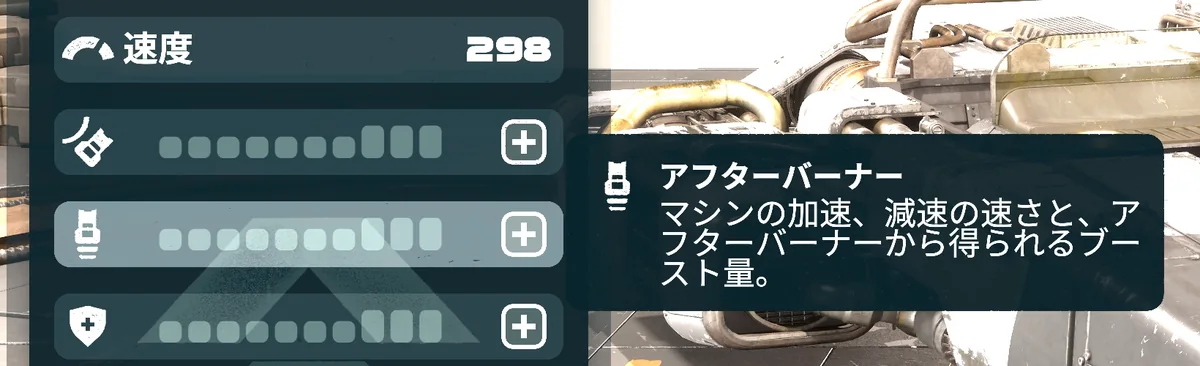
Afterburner doesn’t just improve your boost; it raises your everyday acceleration itself. Acceleration improves by the same percentage at every speed, from low to high. Your top speed on Afterburner and your braking power go up too.
When a Crash or a ram slows you down, you get back up to speed quickly. The more often positions change hands in a race, the more it pays off.
Ramjet Comes Second
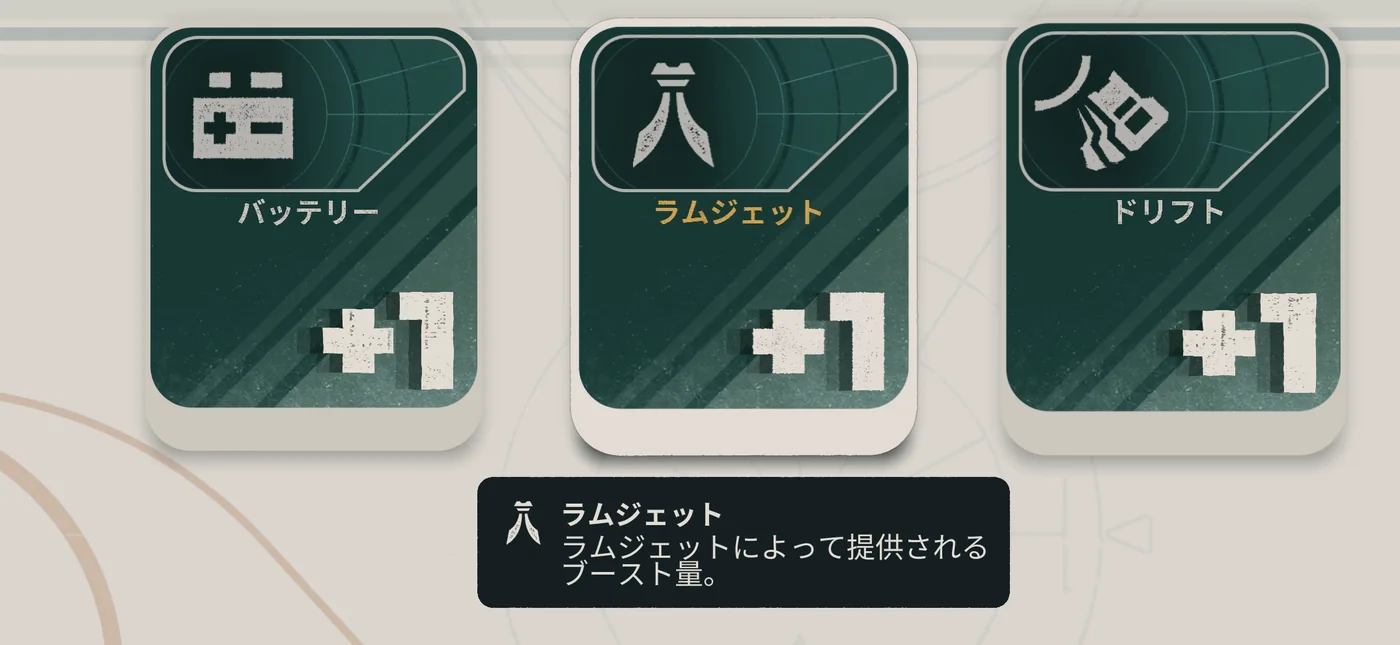
Ramjet raises only your top speed while on Ramjet. Heat builds up at the same rate, so you can burn for just as long, and you’re faster for as long as you’re on Ramjet. The Podracer gains much more from it: +241km/h with all 10 boxes filled.
If you run a build that keeps lowering heat with Parts so the Ramjet almost never stops, it’s fine to raise Ramjet before Afterburner. The longer you stay on the Ramjet, the more the Ramjet upgrades pay off.
Get Resilience Before Sentinel I
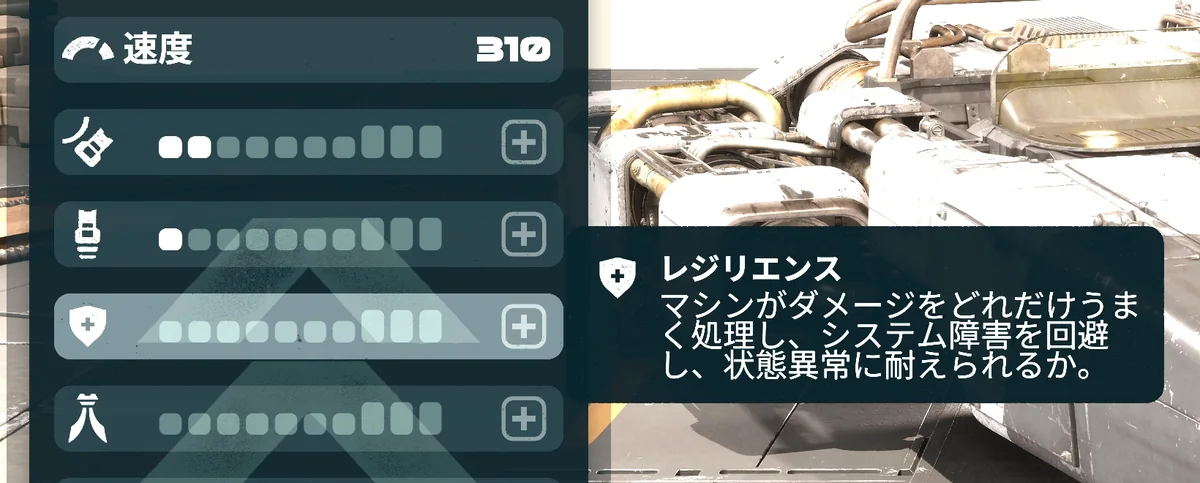
With more Resilience, you get knocked aside less when rammed, and hitting a wall jolts you less. System Malfunction also builds up more slowly (20% less with all 10 boxes), and it takes longer to explode while Corroded.
Sentinel I in Act II has rivers of acid that make it easy to get Corroded, so raise Resilience before you head to Sentinel I.
Cornering, Maneuvering, and Battery Can Wait
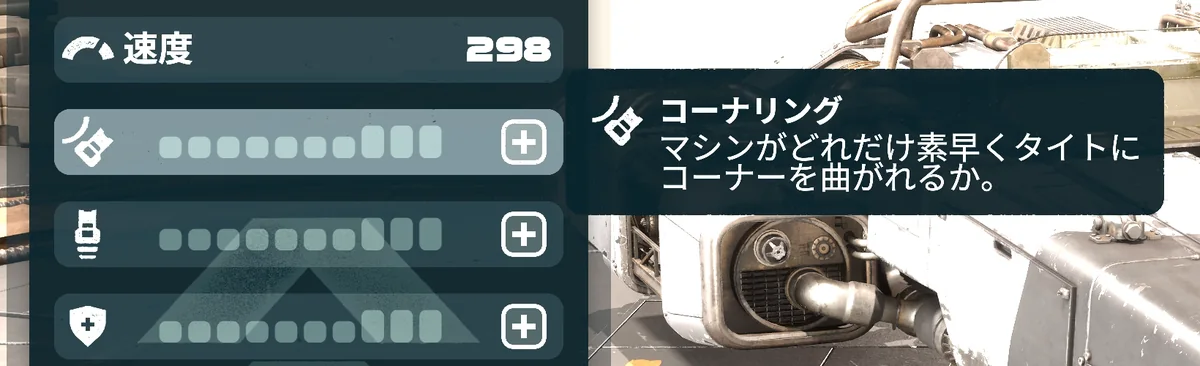
Raising Cornering makes you less likely to slide wide in turns. You can take high-speed curves tighter, and turning on Ramjet gets easier too. It helps if you often fail to make a turn and hit the wall, but it doesn’t directly make you faster.
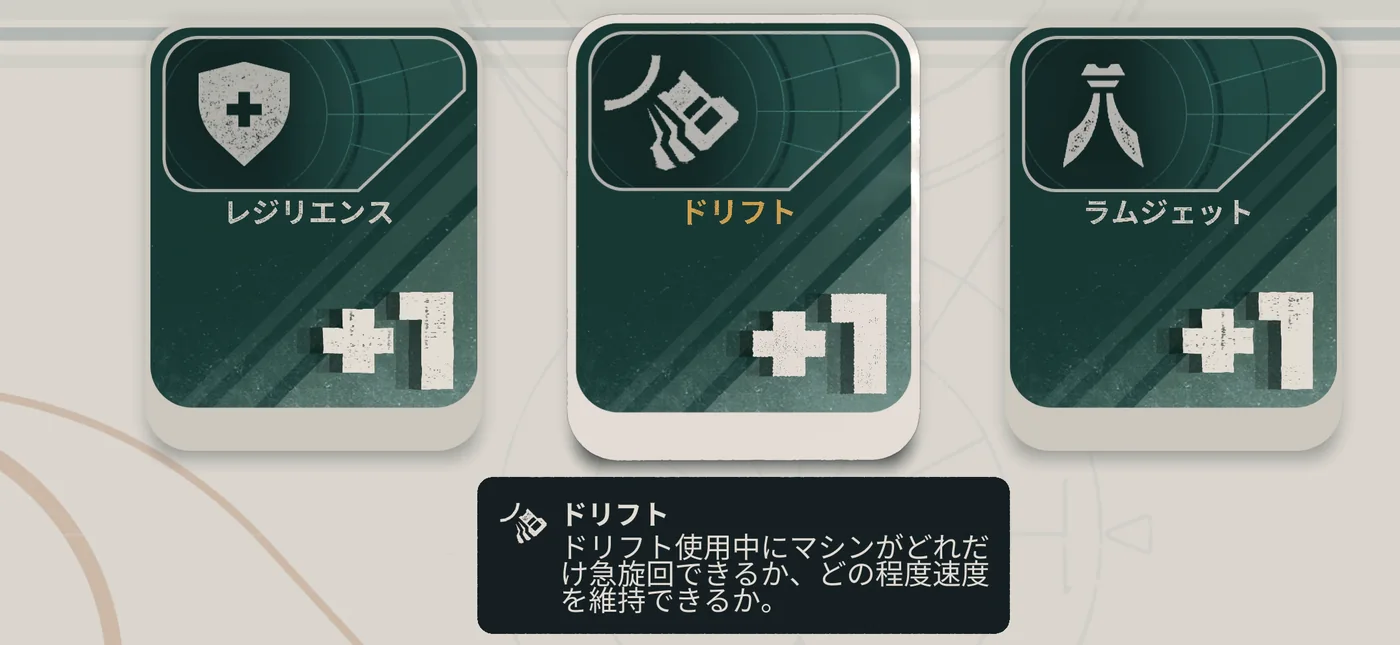
Maneuvering strengthens your Vehicle Type’s special move, such as Drift. The stat’s name changes with the Vehicle Type, and so does its effect. If you rarely use that move, you can leave it alone.
| Vehicle Type | Maneuvering | With 10 boxes |
|---|---|---|
| Landspeeder | Drift | Keeps twice as much speed while Drifting |
| Speeder Bike | Kinetic Burst | Brake charges fully 1 second sooner, and acceleration after release is 50% higher |
| Skim Speeder | Knife Edge | Almost no speed loss during Knife Edge |
| Podracer | Air Brake | 85% more grip while Air Braking |
The Skim Speeder is the one exception: raise its Maneuvering stat, Knife Edge, to 4–5 boxes early. Until you do, you lose a lot of speed every time you turn with Knife Edge.
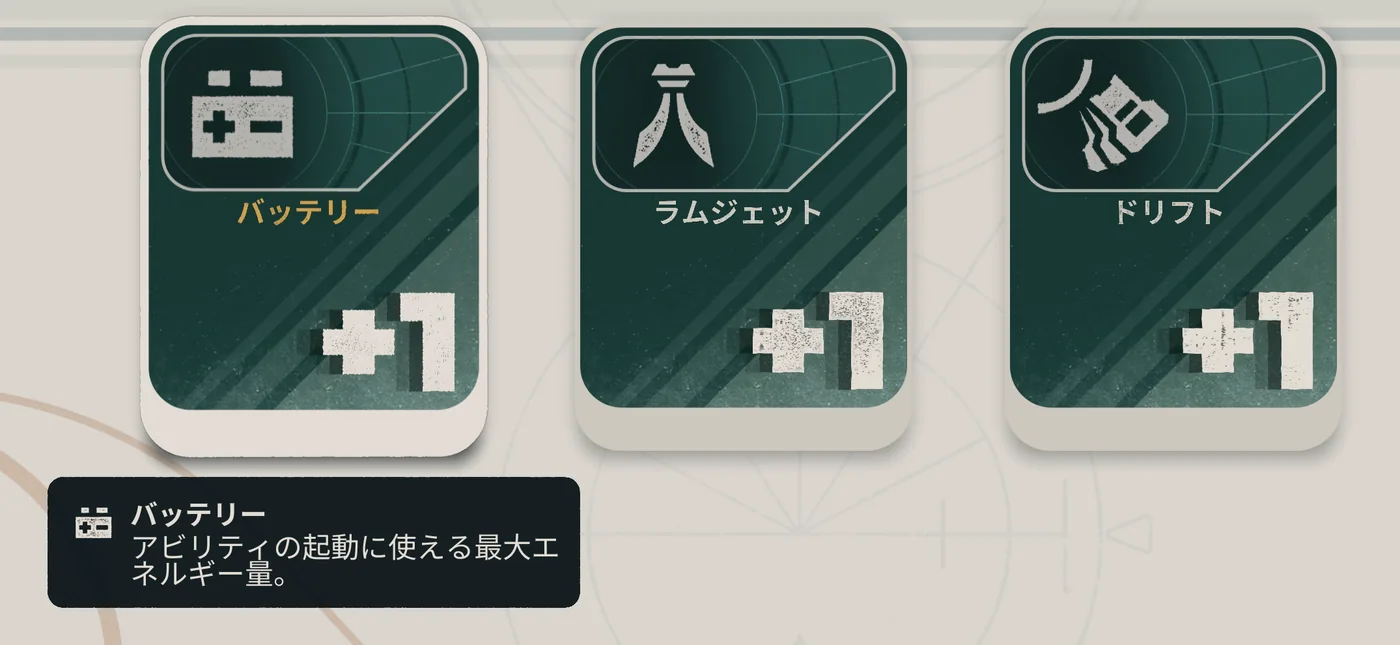
Battery increases the max Energy available for Abilities. Raise it when you want to use Abilities back to back; it doesn’t change how fast you drive.
How Many Tuning Points Do You Need?
Each box you buy raises your vehicle’s level by 1, and the higher the level, the more the next box costs. The cost is the same whichever stat you raise. Levels start at 1 and cap at 15, so you can buy 14 boxes in total.
| Level | Cost | Running total |
|---|---|---|
| 1→2 | 1 | 1 |
| 2→3 | 3 | 4 |
| 3→4 | 4 | 8 |
| 4→5 | 6 | 14 |
| 5→6 | 8 | 22 |
| 6→7 | 9 | 31 |
| 7→8 | 11 | 42 |
| 8→9 | 13 | 55 |
| 9→10 | 14 | 69 |
| 10→11 | 16 | 85 |
| 11→12 | 17 | 102 |
| 12→13 | 19 | 121 |
| 13→14 | 20 | 141 |
| 14→15 | 22 | 163 |
All 14 upgrades cost 163 points. A single stat takes up to 7 boxes, so 7 each in Afterburner and Ramjet gets you the most speed (see the first figure). If Sentinel I is giving you trouble, move some of the Ramjet points into Resilience.
You can reset your allocation at any time by paying 2 points. You get all the points you spent back, so try a setup and redo it if it doesn’t suit you. Tuning Points are separate for each Vehicle Type, so focus them on the one you drive most.
Which +1 Upgrades Should You Pick During a Tour?
Upgrade Packs, which you get from race Rewards and other sources, let you choose one of three +1s to install. A +1 goes into the next empty box on that stat’s bar, and is lost when you’re Knocked Out.
Our beginner’s guide explains what you lose when you’re defeated and what you keep even after being Knocked Out.

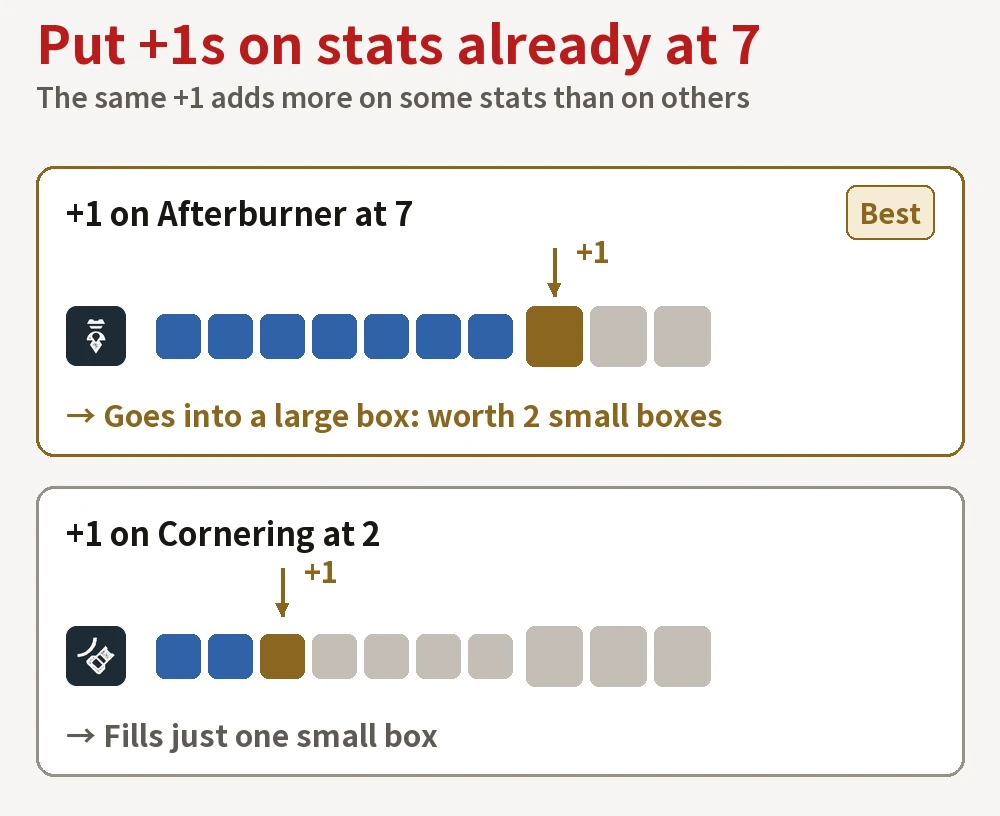
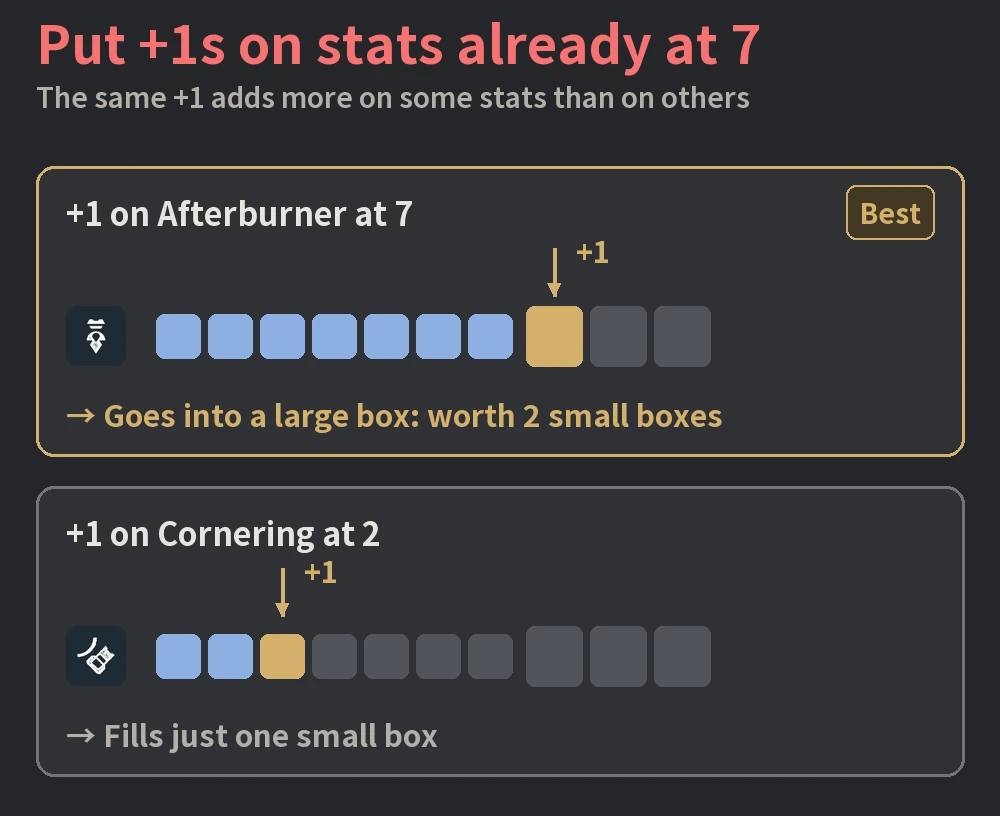
If a stat is already at 7 from Tuning Points, a +1 goes into a large box and counts as two small boxes. Take one on a stat that hasn’t reached 7, and it only fills a single small box. If your Afterburner is at 7, take any Afterburner +1 you’re offered without hesitation.
If nothing you want is on offer, choose Skip Reward to take Credits instead. It’s 1,000 Credits on the first planet, and more on later planets.
Pair Your Upgrades With Parts
At Hibi’s Shop, you can buy individual Parts as well as Upgrade Packs. Parts use their own slots, separate from the Upgrade bars, and your vehicle can hold up to 4.
Some Parts boost Afterburner or Ramjet. Enriched Fuel increases the Afterburner speed boost by 10–100%, and Ramjet Power makes the Ramjet 10–50% more powerful (depending on tier and rarity). Adding Parts of the same kind as the stats you’ve raised to 7 pushes those strengths even further.
Favors That Give You More +1s
As your conversations with rival racers progress, you can earn two Favors that give you more +1s. Both upgrade to II after you clear 2 planets with them equipped, and to III after 4 more.
| Favor | Racer | Effect (I / II / III) | Conversation unlock |
|---|---|---|---|
| Unassuming Prodigy | Goli & 02-R0 | +2 to 1 / 2 / 3 random stats at the start of a tour | Complete 2 Precision Field Tests |
| Fan Club | Lyren Shok | Finishing in the top 3 gives a 20% chance of a bonus +1 / +2 / +3 pack | Beat Lyren Shok in a Head-to-Head Rival race |
Fan Club applies to Races and Eliminators. Unassuming Prodigy gives you +2 from the very start of a tour, so if it lands on a stat you’ve raised to 7 with Tuning Points, two of that stat’s large boxes are filled from the start.
Mystery Encounters That Add or Remove Upgrades
Some Mystery Encounters on the map let you buy Upgrades with Credits, while others offer you a trade.
| Offered by | You give | You get |
|---|---|---|
| Sebulba | 2,000–2,500 Credits | +2 to Ramjet, Battery, or Afterburner, plus a related Part |
| Soren Zaks | 4,000 Credits | +1 to all stats |
| Goli & 02-R0 | 3,000 Credits | 23% chance of +3 (otherwise a Part or League Token, or sometimes nothing) |
| Ary Quill | Remove 3 boxes from one stat | +5 to another stat (e.g., Ramjet → Afterburner) |
| Katja Mox | Win the tour under a handicap such as double heat | +2 to all stats |
If you accept Soren Zaks’ offer, Soren and Ary Quill get tougher for the rest of that tour. Even if you turn down Ary Quill’s trade, there’s a 50% chance she’ll remove 3 boxes from you later.
Ary Quill’s trade is a great chance to add +5 to an Afterburner you’ve raised to 7. For the stat you take boxes from, pick one you haven’t raised with Tuning Points.
All 23 Mystery Encounters, with every choice and its outcome, are covered in our Mystery Encounters guide.








Comments